Difference between revisions of "Command/bleed"
< Command
Jump to navigation
Jump to search
(Created page with "Documentation for \bleed") |
|||
| (8 intermediate revisions by the same user not shown) | |||
| Line 15: | Line 15: | ||
</cd:variants> | </cd:variants> | ||
<cd:description><!-- the long description of the command goes here --> | <cd:description><!-- the long description of the command goes here --> | ||
| − | </cd:description> | + | |
| − | <cd:examples><cd:example title=""> | + | Have a look into the [https://www.pragma-ade.com/general/manuals/details.pdf#page=128 Details manual], it makes no sense to repeat it here. |
| + | |||
| + | Used with {{cmd|bleedwidth}} or {{cmd|bleedheight}} to specify the dimensions of the picture, you can extend the picture to desired border or corner of the page</cd:description> | ||
| + | <cd:examples><cd:example title=""><context source="yes"> | ||
\setuppapersize[A6] | \setuppapersize[A6] | ||
| Line 41: | Line 44: | ||
text after. | text after. | ||
| − | %\bleed [width= | + | \stoptext |
| − | % | + | |
| + | </context> | ||
| + | </cd:example><cd:example title="obviously location is key"><context source="yes"> | ||
| + | |||
| + | \setuppapersize[A6] | ||
| + | \setupheadertexts[] | ||
| + | \starttext | ||
| + | |||
| + | text before | ||
| + | \externalfigure[mill][width=2cm,frame=on,rulethickness=1pt,framecolor=red] | ||
| + | text after. | ||
| + | |||
| + | text before | ||
| + | \bleed [width=2cm,height=3cm,location=tr]{% | ||
| + | \externalfigure [mill] [width=2cm,height=3cm,frame=on,rulethickness=1pt,framecolor=blue]} | ||
| + | text after. | ||
| + | |||
| + | text before | ||
| + | \bleed [width=2cm,height=2cm,location=tr]{% | ||
| + | \externalfigure [mill] [width=2cm,height=3cm,frame=on,rulethickness=1pt,framecolor=green]} | ||
| + | text after. | ||
| + | |||
| + | text before | ||
| + | \bleed [width=1cm,height=2cm,location=tr]{% | ||
| + | \externalfigure [mill] [width=2cm,height=3cm,frame=on,rulethickness=1pt,framecolor=cyan]} | ||
| + | text after. | ||
| + | |||
| + | \stoptext | ||
| + | |||
| + | </context> | ||
| + | </cd:example><cd:example title="Used with {{cmd|bleedwidth}} or {{cmd|bleedheight}} "><context source="yes"> | ||
| + | |||
| + | \setuppapersize[A6] | ||
| + | \setupheadertexts[] | ||
| + | |||
| + | \starttext | ||
| + | |||
| + | text before | ||
| + | \externalfigure[mill][width=2cm,frame=on,rulethickness=1pt,framecolor=red] | ||
| + | text after. | ||
| + | |||
| + | text before | ||
| + | \bleed [width=1cm,height=2cm,location=l]{% | ||
| + | \externalfigure [mill] [width=\bleedwidth,height=\bleedheight,frame=on,rulethickness=1pt,framecolor=cyan]} | ||
| + | text after. | ||
| + | |||
| + | text before | ||
| + | \bleed [width=1cm,height=2cm,location=br]{% | ||
| + | \externalfigure [mill] [width=\bleedwidth,height=\bleedheight,frame=on,rulethickness=1pt,framecolor=green]} | ||
| + | text after. | ||
\stoptext | \stoptext | ||
| − | + | </context> | |
</cd:example></cd:examples> | </cd:example></cd:examples> | ||
<cd:notes></cd:notes> | <cd:notes></cd:notes> | ||
Latest revision as of 18:12, 8 May 2024
Contents
\bleed
Summary
The command \bleed is used to modify the actual dimension of the place allocated to a figure.
Settings
Description
Have a look into the Details manual, it makes no sense to repeat it here.
Used with \bleedwidth or \bleedheight to specify the dimensions of the picture, you can extend the picture to desired border or corner of the page
Examples
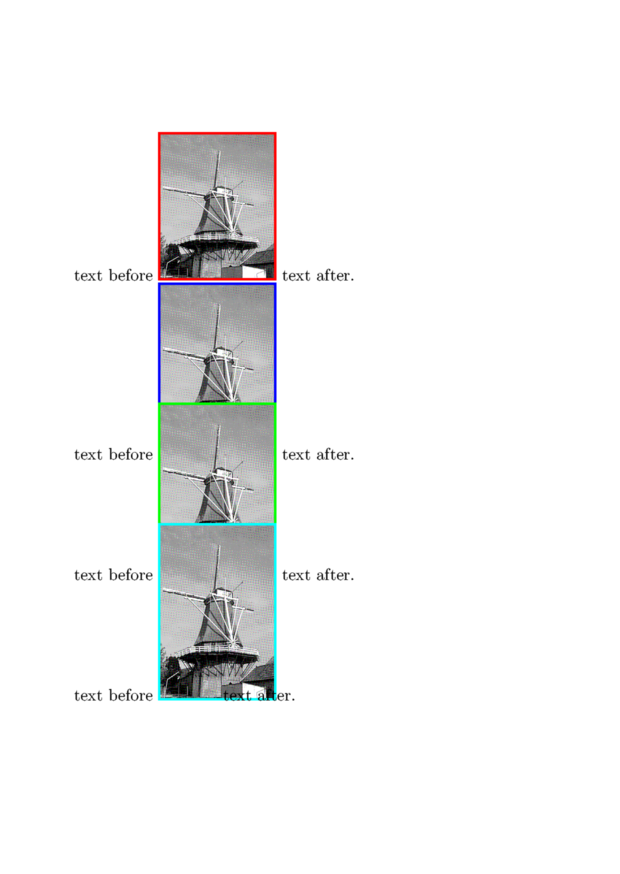
Example 1
\setuppapersize[A6]
\setupheadertexts[]
\starttext

text before
\externalfigure[mill][width=2cm,frame=on,rulethickness=1pt,framecolor=red]
text after.

text before
\bleed                 [width=2cm,height=3cm,location=l]{%
\externalfigure [mill] [width=2cm,height=3cm,frame=on,rulethickness=1pt,framecolor=blue]}
text after.

text before
\bleed                 [width=2cm,height=2cm,location=l]{%
\externalfigure [mill] [width=2cm,height=3cm,frame=on,rulethickness=1pt,framecolor=green]}
text after.

text before
\bleed                 [width=1cm,height=2cm,location=l]{%
\externalfigure [mill] [width=2cm,height=3cm,frame=on,rulethickness=1pt,framecolor=cyan]}
text after.

\stoptext

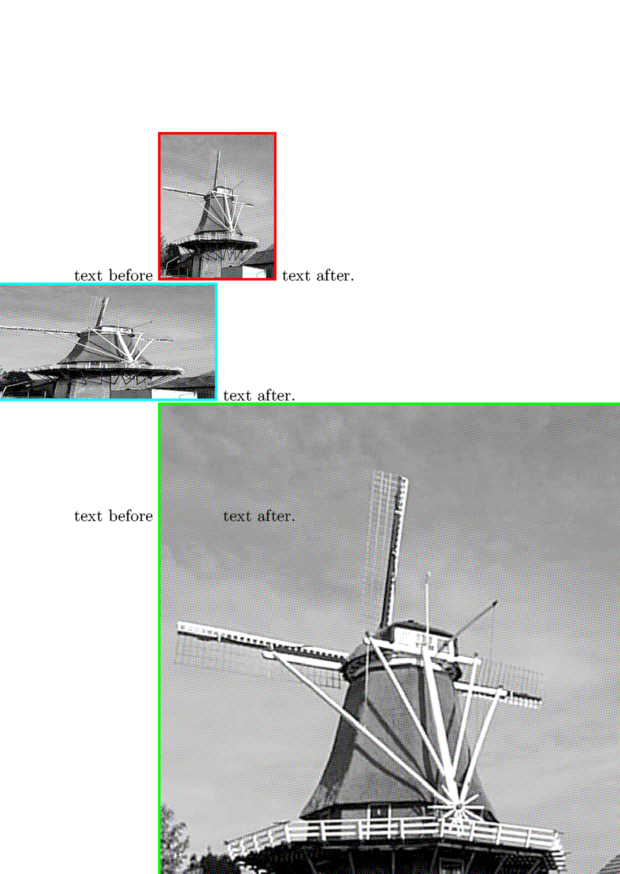
obviously location is key
\setuppapersize[A6]
\setupheadertexts[]
\starttext

text before
\externalfigure[mill][width=2cm,frame=on,rulethickness=1pt,framecolor=red]
text after.

text before
\bleed                 [width=2cm,height=3cm,location=tr]{%
\externalfigure [mill] [width=2cm,height=3cm,frame=on,rulethickness=1pt,framecolor=blue]}
text after.

text before
\bleed                 [width=2cm,height=2cm,location=tr]{%
\externalfigure [mill] [width=2cm,height=3cm,frame=on,rulethickness=1pt,framecolor=green]}
text after.

text before
\bleed                 [width=1cm,height=2cm,location=tr]{%
\externalfigure [mill] [width=2cm,height=3cm,frame=on,rulethickness=1pt,framecolor=cyan]}
text after.

\stoptext
Used with \bleedwidth or \bleedheight
\setuppapersize[A6]
\setupheadertexts[]

\starttext

text before
\externalfigure[mill][width=2cm,frame=on,rulethickness=1pt,framecolor=red]
text after.

text before
\bleed                 [width=1cm,height=2cm,location=l]{%
\externalfigure [mill] [width=\bleedwidth,height=\bleedheight,frame=on,rulethickness=1pt,framecolor=cyan]}
text after.

text before
\bleed                 [width=1cm,height=2cm,location=br]{%
\externalfigure [mill] [width=\bleedwidth,height=\bleedheight,frame=on,rulethickness=1pt,framecolor=green]}
text after.

\stoptext